The Complete Business Process
Home » Getting Started Guide » Process Guide
Creating Organizations and Contacts
teamspace helps your company to digitize your processes. For most companies, the collected customer data is the foundation for successful work. teamspace offers you many options for data maintenance and evaluation for this purpose. A distinction is made between organizations and contacts – the company and its employees. In the following we will show you an example of how you can enter new customer and contact data.
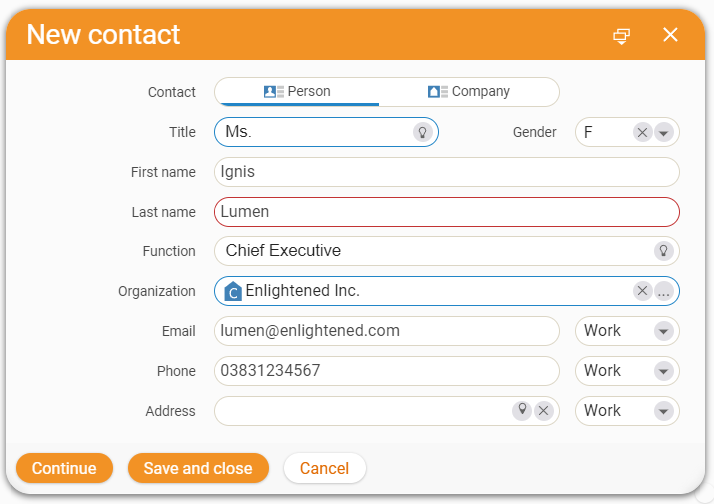
In our example you would like to create Ms. Ignis Lumen as a contact, the managing director of the company “Enlightened Inc.”, a manufacturer of illuminants.
1. Creating Organizations
If you have received the company data of a new prospective customer, it is recommended to enter this organization in teamspace first. To do this, first click on CRM in the main menu. Here you can use the “+” button to open a dialog for organization creation.
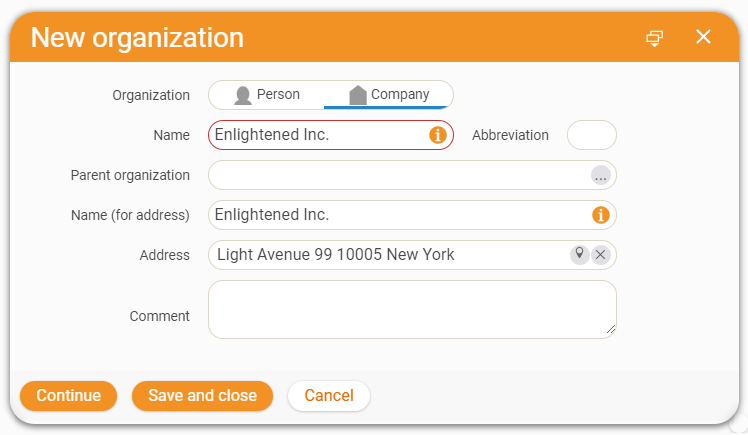
In this dialog you can enter general data for the prospect, such as the name and address. As a minimum, a name is sufficient for creation. If available, you can also enter commercial data.
Once you have completed the dialog, click Continue.
You are now in the overview of the organization, where all related information is displayed. Here you can see, among other things, a timeline that lists all the elements in chronological order that have been created in teamspace in connection with the organization. Since “Enlightened Inc” has been newly created, the timeline is empty.
Under the Master data tab in the Detail Manager menu, you can store a variety of information in teamspace. For example, you can store all the data you have collected about “Enlightened Inc”, manage it and finally analyze it.
If there is customer information for which you cannot find a suitable field in the master data, a multitude of additional fields can be added. Individual fields according to your requirements can also be configured.
2. Creating Contacts within an Organization
After the organization, its managing director Ms. Ignis Lumen should now also be stored in the system. You can do this directly from the organization. In the Overview tab, you will find the Contacts section on the right side under the Last changed elements heading. By clicking on the “+” symbol you open the creation dialog for contacts. Alternatively, you can also switch to the Contacts tab in the Detail Manager menu of the Organization.
As with the organization, you can store general information about the contact here. Since the contact is created from a company, this is already entered.
Once you have entered everything important, click Continue. Just as with the organization, you will be redirected to the Overview of the contact. Here you will also find the timeline with all elements that have been created in teamspace for Ms. Lumen. Under Master data you can store further information.
3. Create Contacts without Organization
You can also store contacts in teamspace that do not belong to an organization. To do so, select CRM in the main menu. Here you can use the “+” symbol to open a dialog for contact creation. Enter the information about the contact and leave the Organization field empty.
Create Contacts and Organisations – Quickly and Easily
Create and Send an Offer
Via teamspace you can digitize the complete way from creating an offer to the later billing. In the following we would like to show you how you can create an offer for an organization or a contact from your customer data.
As an example we use Mrs. Ignis Lumen, who has requested an offer for the following services.
- 16 hours of consulting
- A one-day workshop
- 10 monthly licenses of a software
1. Creating an Offer
You can create an offer in different ways. For example, select “Finance” in the main menu. Here you can create a new document by clicking on the “+” symbol. In the following dialog, set the Type to Offer.
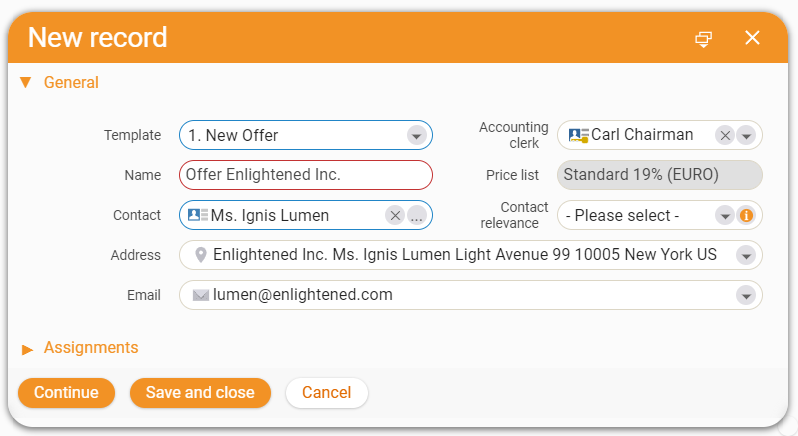
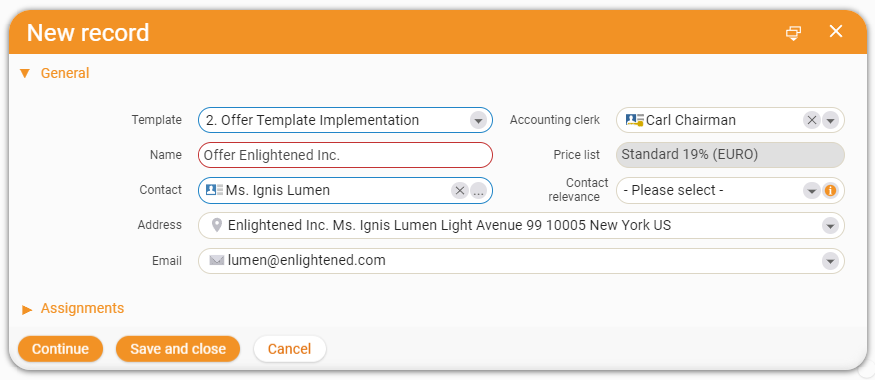
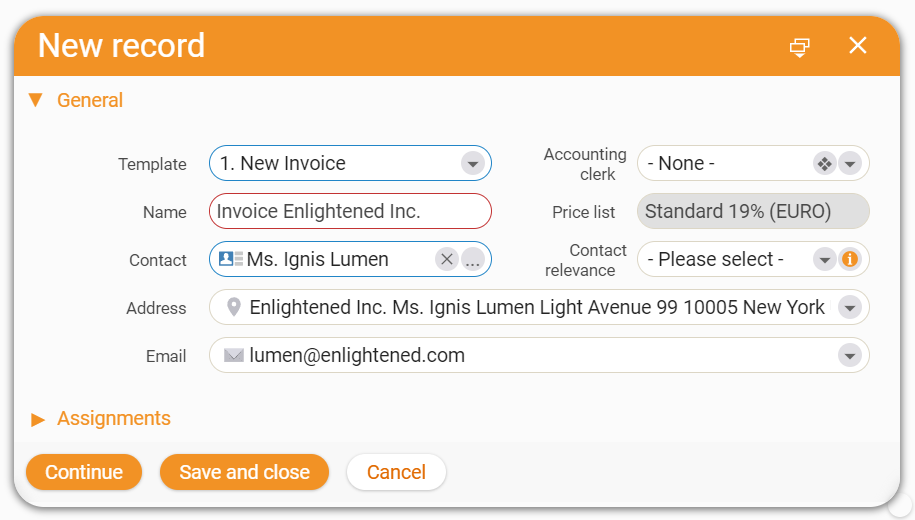
Now the creation dialog for an offer opens. In the Template field, select New offer. Then enter the name of the offer and the contact to whom you want to address it.
Alternatively, you can also create an offer from within CRM. When you are in the Overview of a contact or organization, you will find the Finance records section on the right side under the Last changed elements heading. By clicking on the “+” there, you will also create new records.
The dialog is the same in both cases. By going through the CRM, the Contact field is already pre-filled. When you have entered all the information, click Continue.
2. Adding Items
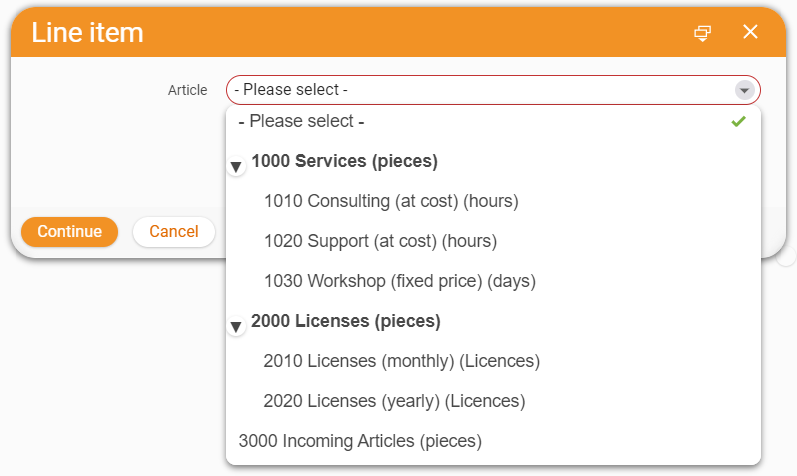
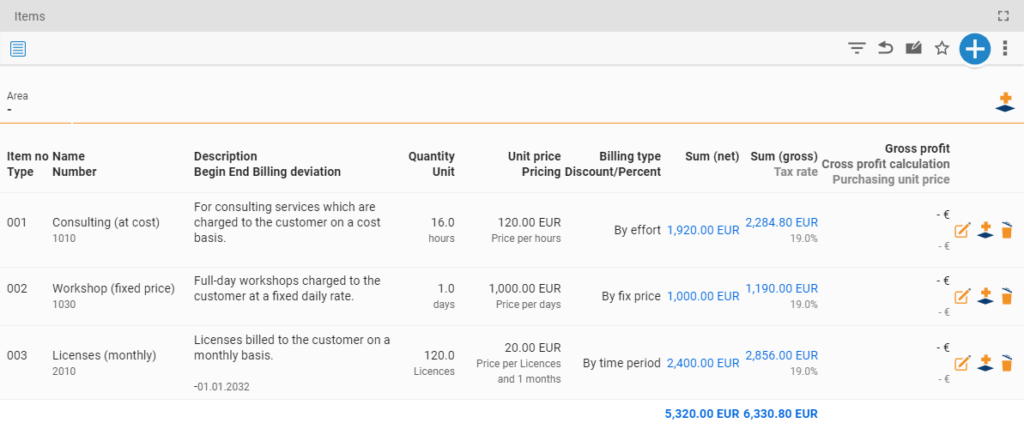
In the offer, start in the Items tab. The list of items is initially empty and must be filled. Here you enter the services and goods that you would like to offer to your prospective customer. By clicking on the “+” symbol you can open the dialog for a new item. Here you get access to the item master stored in teamspace.
Select the article you want to add.
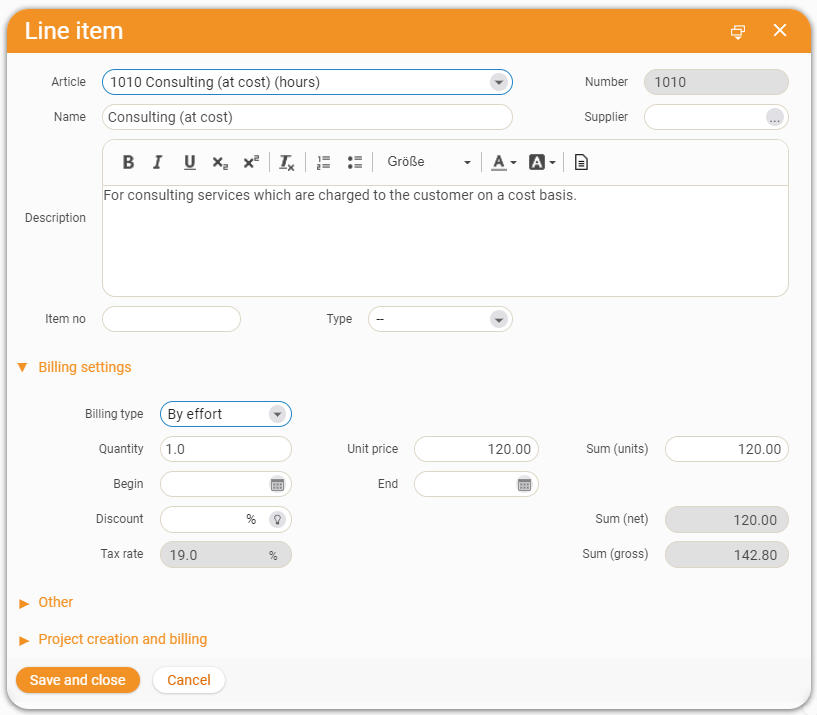
For our example we select the article “1010 Consulting (at cost)”. In the following dialog, the item will be configured. Default values, such as the Unit price, are already entered in the item. These only need to be adjusted to the wishes of the prospect. To do this, we enter the hourly value that was requested in the Quantity field.
When you have completely configured the item, click on Save and close.
You have now added the first item to your offer. Repeat the described procedure until all services and goods required by the prospective customer have been created.
When you have finished configuring the offer, you can validate it by clicking the Create Offer button. This will give it an official offer number and protect it against further changes. By clicking the button Activate edit mode, you can remove this protection again.
You can use blocks to additionally structure the items of your offer. To do this, assign ablocks to individual items in your offer. This allows you to group different services and products together and distinguish them from each other.
3. Creating an Offer by a Template
Often offers have a similar structure. Instead of creating a completely new offer for each prospective customer, you can use offer templates. In them, related items can be preconfigured and suitable offers can be created quickly. To do this, select a preconfigured template in the Template field in the offer creation dialog.
The Implementation Offer template already contains all the items that were requested in our example. If you use this, you only need to adjust the items to the specific case, for example, by entering the requested Quantity. When you have finished configuring the offer, you can validate it by clicking the Create Offer button.
4. Sending an Offer
In the detail manager menu you will find the Preview tab. When you select it, you will see how your offer will look like in PDF format. The information you have entered in the Items tab will be transferred to this document. Now you have different possibilities to send the PDF to the prospect. If a mail account is configured in teamspace, you can open a ticket dialog by clicking the Send per Mail button. The file will be attached automatically and the addressee of the mail will also be entered from the CRM contact of the offer.
In the Preview tab, you have the option to download the PDF to send the file in another way. You can also print the document to send it by post.
5. Overview of Existing Offers
If you want to have an overview of the offers created by you and your colleagues, select the Finance button in the main menu. Here you will find the Offer management tile. There you will get a list of your current offers including their order status.
We will show you how to create an Offer in teamspace
Order Confirmations in teamspace
With the order confirmation, teamspace supports you in invoicing your goods and services. In the following, we will show you how you can create an order from an already generated offer and thus save yourself duplicate work.
If you want to create an order independently from an offer, you will find the instructions here.
As an example we use the offer to Ms. Ignis Lumen, who was offered the following services and has now placed an order with you.
- 16 hours of consulting
- A one-day workshop
- 10 monthly licenses of a software
1. Creating an Order Confirmation from an Offer
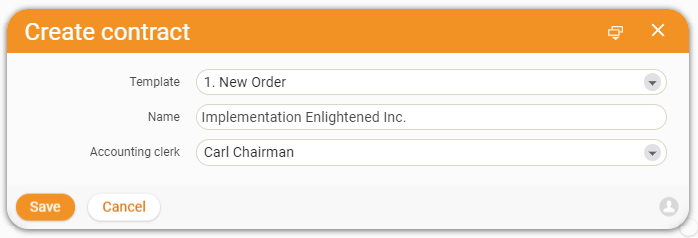
The way to order confirmation starts in the offer. For example, select “Finance” in the main menu and then select the Offer management tile. Find the offer for which you want to create an order. In this case, we will use the offer for Enlightened Inc. that was previously configured. On the left side you will find the Generate Confirmation button. Now the creation dialog for an order opens. In the following dialog, customize the name of the order and click Save.
The order contains the same items that were configured in the offer. You can adjust the items, remove them or add new ones. If the items meet your requirements, you can validate the document using the Generate Confirmation button.
2. Sending an Order Confirmation
The Preview tab allows you to view your order confirmation in PDF format. Changes you make in the Items tab are automatically applied to this document. There are several ways to send the PDF to your prospect. If you have created a mail account, you can send the order confirmation by clicking the Send per mail button. The file will be automatically attached and the mail address will be taken from the CRM contact of the offer.
In the Preview tab, you also have the option of downloading the PDF file or printing it out for mailing.
3. Invoiceability of Order Items
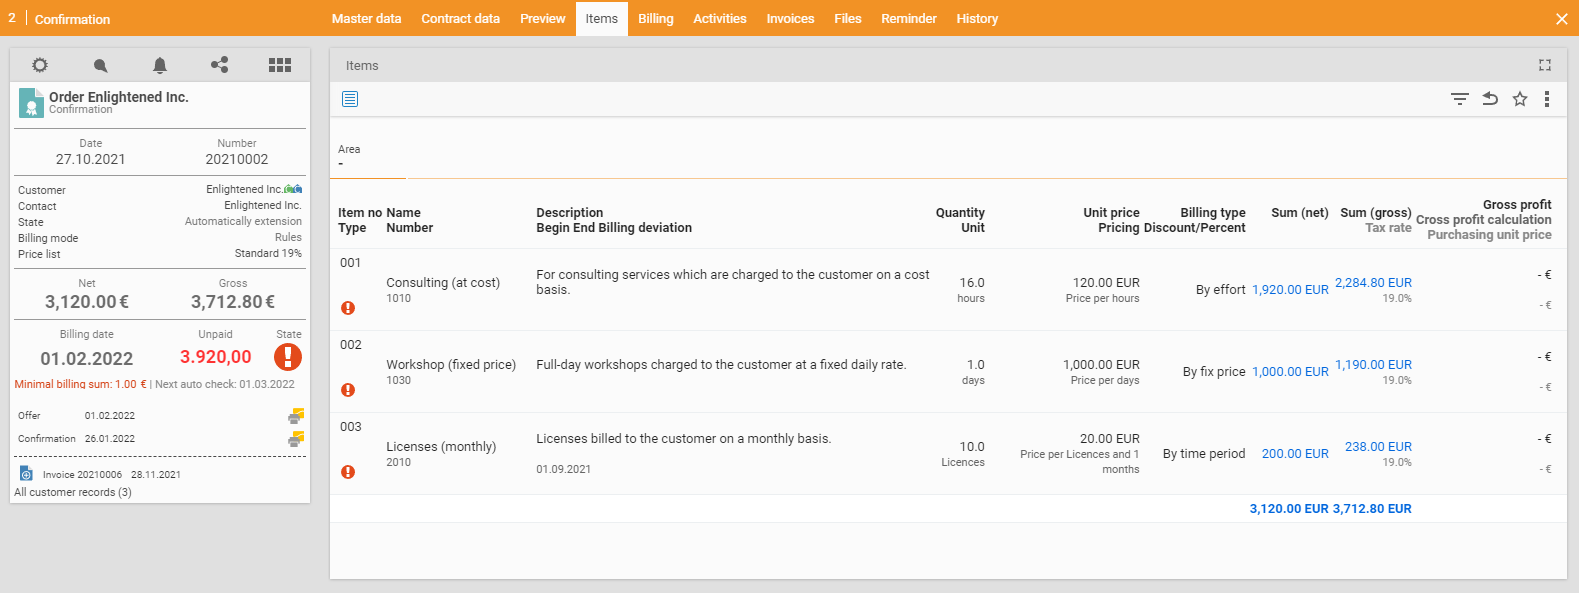
The items of an order give you information about the invoiceability of the goods and services.
Means that the selected item is billable.
Means that the item is not yet billable. Billing conditions that have been set must be met first.
Means that the item is fully billable.
The invoiceability of an item and which conditions must be fulfilled for invoicing is determined in different ways.
One factor is the billing type of the item to be billed:
Fixed Price
Items or services that are billed with a fixed price. Fixed price items are directly billable in the standard system.
According to Effort
Services whose price is based on the project time spent on the order item. They are billed according to a fixed hourly or daily rate, provided that the project times belonging to the item have been tracked with teamspace.
By Duration
Items or services that are billed recurrently in a fixed cycle. Items of this type need a start date in order to be billed.
By Percentage
This billing type allows you to map percentage markups or discounts to other items or areas.
Billing rules for the individual items are another factor. These can be used to link billability to a date or the status of a linked project, for example.
You can also specify billing rules for the order as a whole. These have a higher ranking than the rules of the items. If not all rules of the order are fulfilled, the order will not be displayed as billable even if all contained items are billable.
You have many options for specifying the type of your order billing. Among other things, you can set payment plans for your order to bill your customers for progress payments.
4. Overview of Existing Orders
For an overview of your orders, select the Finance button in the main menu and click on the Contract management tile. There you will find all current orders including their billing status.
Watch the Video on how to create an Order Confirmation
Creating a Project from an Order
Projects in teamspace
You can plan and control the services you provide for your customers in teamspace. A project is essential especially for tracking times. This is especially true if you want to charge your customers for services based on time and effort. With teamspace you can create a project directly from an order. This not only facilitates project creation, but also allows you to conveniently bill tracked project times.
If you want to create a project independently from an order, you can find the instructions here.
As an example we use the order of Enlightened Inc. from the previous tutorial.
1. Creating a Project from an Order
teamspace allows you to use your orders as a template for the associated project. This can save you a lot of configuration work. To do this, call up the order for which you want to create a project.
Our example order contains three items:
- 16 hours of consulting
- A one-day workshop
- 10 monthly licenses of a software
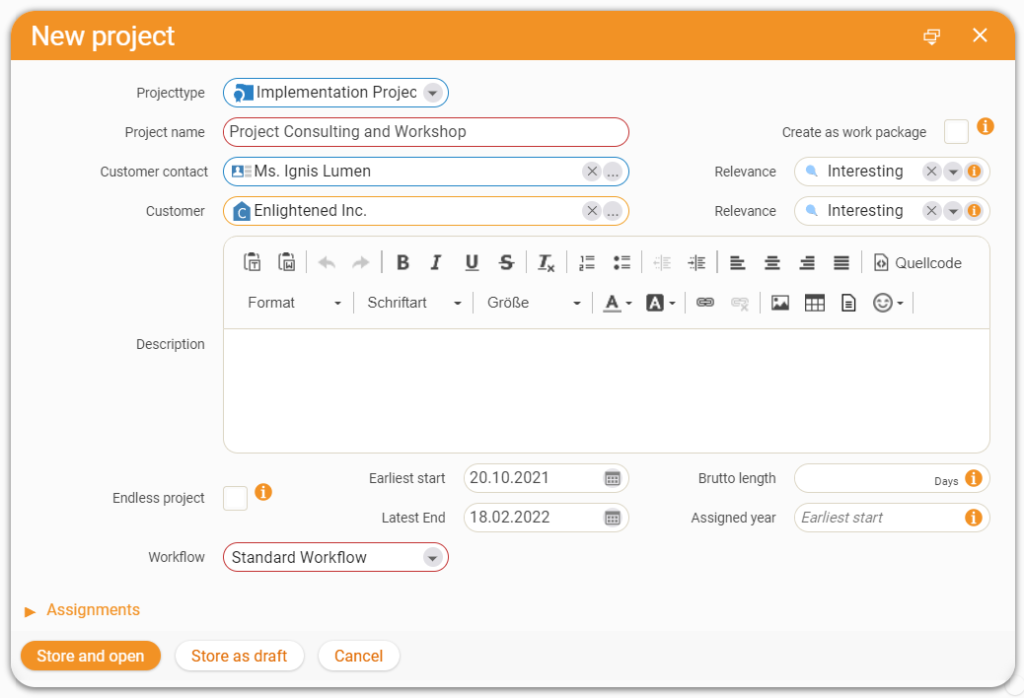
In the action box you will find the button Create project. In the following dialog you indicate that you want to create the project as a main project. Now you can make some project settings in advance. You have to fill at least the fields Project type and Status. Here we enter Implementation project and In progress. You can also define the beginning and the end of the project here.
teamspace creates a main project with two work packages from the order and the three items contained in it. The latter are created from the items Consulting and Workshop. No package has been created for the item Licenses, since licenses usually do not represent a task that has to be processed by employees or tracked for time.
Whether and how an item is transferred to a project when it is created can be configured via the items. This way, the same services or goods are displayed in the same way in all projects.
2. Planning of a new Project
After you have created the project from the order, you can now plan it in more detail. Three pieces of information are of particular importance for a project:
- The schedule (When does the project start and when does it have to be completed?)
- The time budget (How much work time must be done to implement the project?)
- The people working on the project (Who will do the work to complete the project?)
You could already define the schedule during the creation of the project. In the project you can additionally assign individual durations to the single elements.
teamspace supports you with the time budget by transferring relevant information from the order to the project. For example, the work package consulting automatically receives a time budget of 16 hours and the workshop of 8 hours. This corresponds to the values that were offered to the customer for the services.
Now only the people who work on the project have to be defined. To do this, you can click in the respective field in the Project Roles column. In the following dialog, you can enter the persons or groups who are to work on the project in the Employees field.
If you have entered the above information, your project is ready for work.
How to create an Order from a Project
Book Times on a Project
Times in teamspace
In teamspace we distinguish between two different forms of time tracking: attendance times and project times:
Attendance Time
… is the total time you spend on your work per day. It tells you from when to when you worked and how long you took a break.
Project Time
… is the time you spent per day on a certain activity. It tells you, for example, how long you worked in total on a certain project.
Somewhat simplified, you could say: Attendance times tell you how long you worked. Project times tell you what you have worked on during this time.
You can use both time forms in teamspace, but you can also track only attendance times or only project times.
If you track both attendance and project times, you can post individual blocks of your attendance to those projects you worked on – for example, customer projects or day-to-day business. The following graphic illustrates this principle:
If you track both types of time, the sum of project times on one day should be the same as the attendance time on that day.
In the following example we refer to an order of “Enlightened Inc.” and want to book two hours of consulting on the corresponding customer project.
You track attendance times in projectfacts via the status bar. There you will find the following button, which you can use to check in and out at any time.
1. Booking Times
There are different options for booking times in teamspace, which you can use flexibly depending on your preferences and your workday.
Booking Times via “My Day“
My Day is a tile in teamspace that you can find under the menu item time tracking. You can access it even faster by clicking on time tracking in the status bar.
It will show you the attendance time you have already tracked for today. You can also jump to any other day using the calendar in the upper left corner.
To book a new project time, click on the “+” symbol or use the Book time option in the action box. The following dialog will open.
Here you can select the project on which you want to book your time. You can book time to entire projects or individual work packages. Use the Heading field to select whether it is a time that can be billed to the customer or not. In our case we click on the “Customer project Enlightened Inc” and select the work package “Consulting” with the arrow at the end of the line. We set the Activitiy area to “billable”.
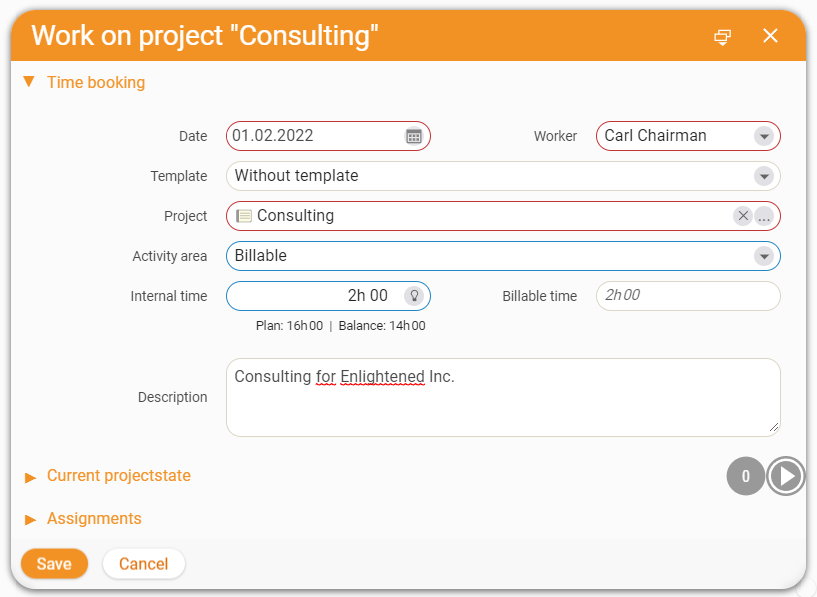
In the field Internal time you enter the duration you want to book. You mark hours with an “h” at the end. Alternatively, you can find some predefined intervals via the light bulb. If it is a billable time, you can additionally determine how much time should be billed via the Billable field. We enter 2h as internal time.
Finally, we can add a Description of the activity and optionally save the time entry as a Template. If you now click on Save, the booking will appear as a list entry under My Day.
Booking Times via Templates
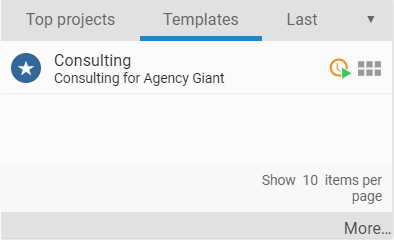
If you save a time as a template via the booking dialog, you can reuse it as you wish via the My Day tile. You can find them under the Templates tab in the box at the top right.
If you click on a template, you will get into the booking dialog, the data from the template will be taken over automatically. With a click on Save you execute the booking again for the currently selected day.
Time Booking via Stopwatch
If you want to track e.g. service times very precisely, you can use the stopwatch in teamspace. To activate it, click on My Day in the Time Tracking section. There you will find the button Start stopwatch in the action box on the left. In the following dialog you can select the activity for which you want to stop the time. Then the stopwatch will start automatically. The elapsed time appears in the status bar. You can stop the stopwatch at any time and the time will be booked on the selected project.
Book Times within a Project
Even if you are currently within a project, you can book times directly from there. For example, switch to the Enlightened Inc customer project.
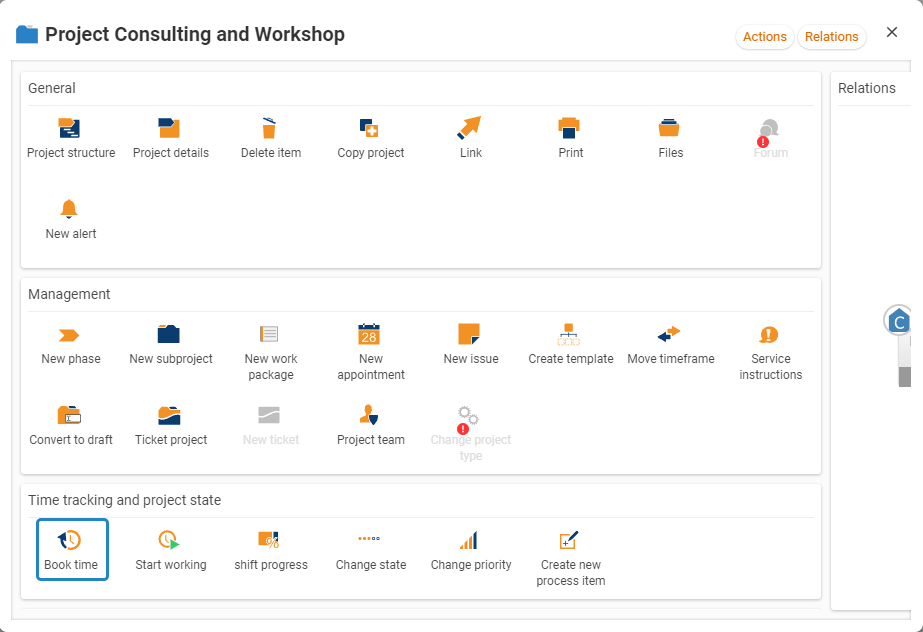
In the overview of the project structure you will find all work packages assigned to the project, namely consulting for 16 hours and a one-day workshop. Via the action menu at the end of the line (chocolate bar) you have access to all actions. There you can select Book time in the Time tracking and project status area and you will now get to the same time tracking dialog as under “My Day”.
View booked Times
You can view your booked times in different places. For example, if you want to see the project times for a specific day, switch to the My Day tile. Here you will find a complete overview of all the times you have booked for a particular day.
If you are interested in those project times that belong to a specific order, switch to the Times tab in the order confirmation. You can also access booked times within a project. You can find them in the project details in the Activities tab under the Times option.
We show you how to book Working Time on a Project
Generating an Invoice from an Order
Invoices in teamspace
With the order confirmation, teamspace supports you in invoicing your goods and services. In the following, we will show you how to generate an invoice from a billable order.
If you want to create an invoice independently from an order, you will find the instructions here.
As an example we use the order of Ms. Ignis Lumen, which includes the following services and which can now be invoiced.
- 16 hours of consulting
- A one-day user training course
- 10 monthly licenses of a software
1. Selection of a Billable Order
An order confirmation serves as a basis for the creation of invoices. Select, for example, “Finance” in the main menu and then the tile Contract management. If billable orders are marked with a red exclamation mark. In this case we use the order Enlightened Inc., which was configured before. In the item list you can see that all contained items are billable. On the left in the info box it is shown that the sum of the billable services is 3920.00 €. This sum is to be invoiced.
2. Create an Invoice from an Order
In the action box on the left side you will find the button Create invoice. After a click, the creation dialog for an invoice opens. In the following dialog, customize the name of the invoice and click Save.
The invoice contains all items from the order that were billable when the invoice was created. When the invoice is created, you can validate the document by clicking the Create invoice button.
For expense items, all time entries that were tracked in connection with the order and have not already been charged in another invoice will be billed.
After validation, the info box on the left margin shows you the payment status of the invoice. A green circle means that the invoice is still open, but the due date has not yet passed.
If the circle turns red, the due date has expired without an incoming payment being registered in the system.

3. Sending an Invoice
You can view your invoice in PDF format via the Preview tab. For invoices, you will also find a PDF for the activity report. There are several ways to send the PDF to your customer. If you have created a mail account, you can send the invoice by clicking the Send per mail button. The invoice PDF will be automatically attached and the mail address will be taken from the CRM contact of the document.
In the Preview tab, you also have the option to download the PDF file or print it for mailing.
4. Overview of your Invoices
For an overview of your invoices, select the Finance button in the main menu and click on the Invoice management tile. There you will find all current invoices including their payment status.

